Build Custom Web Forms
Summarized Video Transcript
Part 4 will teach you how to build a payment form in Caspio and deploy it to your website.
First, you must have an SSL certificate provided by your hosting company. This means your website needs to be an HTTPS.
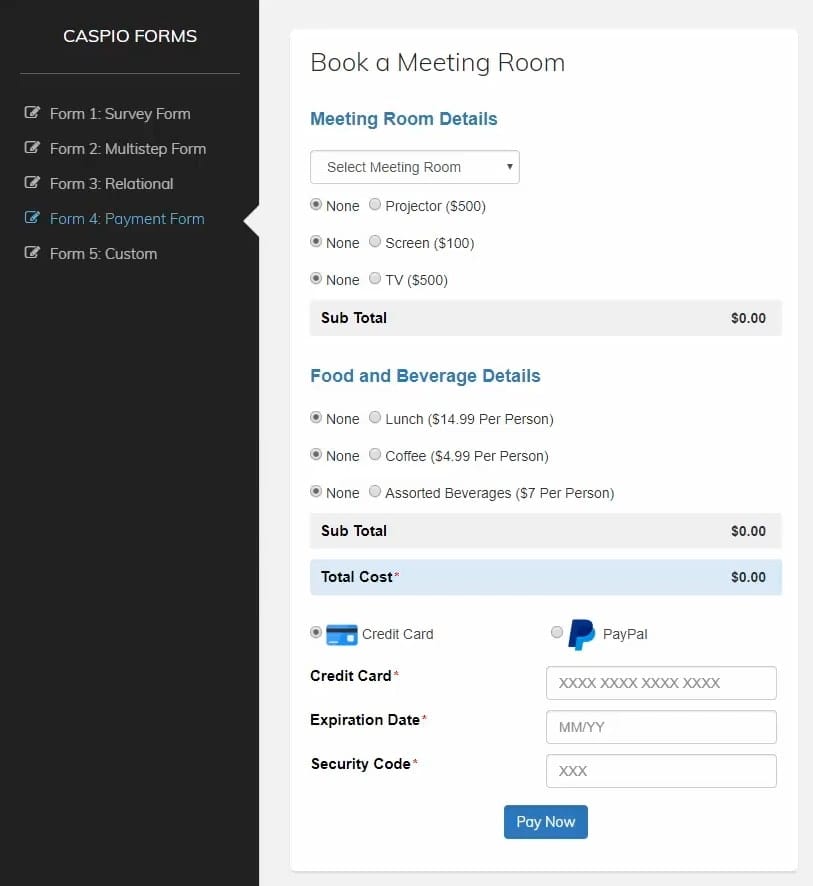
In this example, you’ll learn how to build a form that allows you to book a meeting room. Other functions include subtotal and grand total calculations, and ways to process the payment (credit card or PayPal).
Setting Up Your Payment Processors
Once inside your Caspio account, go to the Tools dropdown on top and click Payment Processors.
If you don’t see this option in the dropdown menu, you don’t have the right plan with Payment Processors. Check our pricing page for more details.
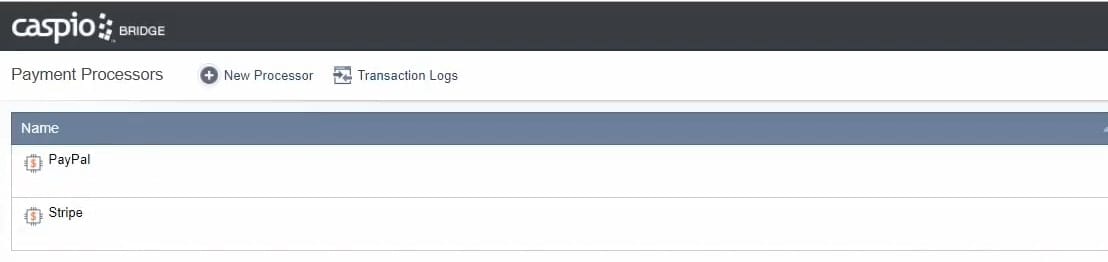
To set things up, click New Processor on top and follow the instructions prompted on the screen. At the moment, Caspio allows you to connect to either Stripe or PayPal. You’ll need to have a Stripe or PayPal business account to have payment gateways connected to Caspio.
Once you’re done configuring one or both, click Home to go back to your homepage.
Creating Your Database Table
Similar to the previous videos, click the New App link on top when setting up a new application. You’ll then be given two options to begin:
- By importing data from Excel or an Access database
- With a blank app
Click the second option to build your application from scratch.
You’ll then be prompted to name your app — input Payment Form for this tutorial and click Finish to see your app listed on your home screen.
Next, Open the new app container to access the App Overview. You’ll find all the different objects to build apps on the left-hand panel.
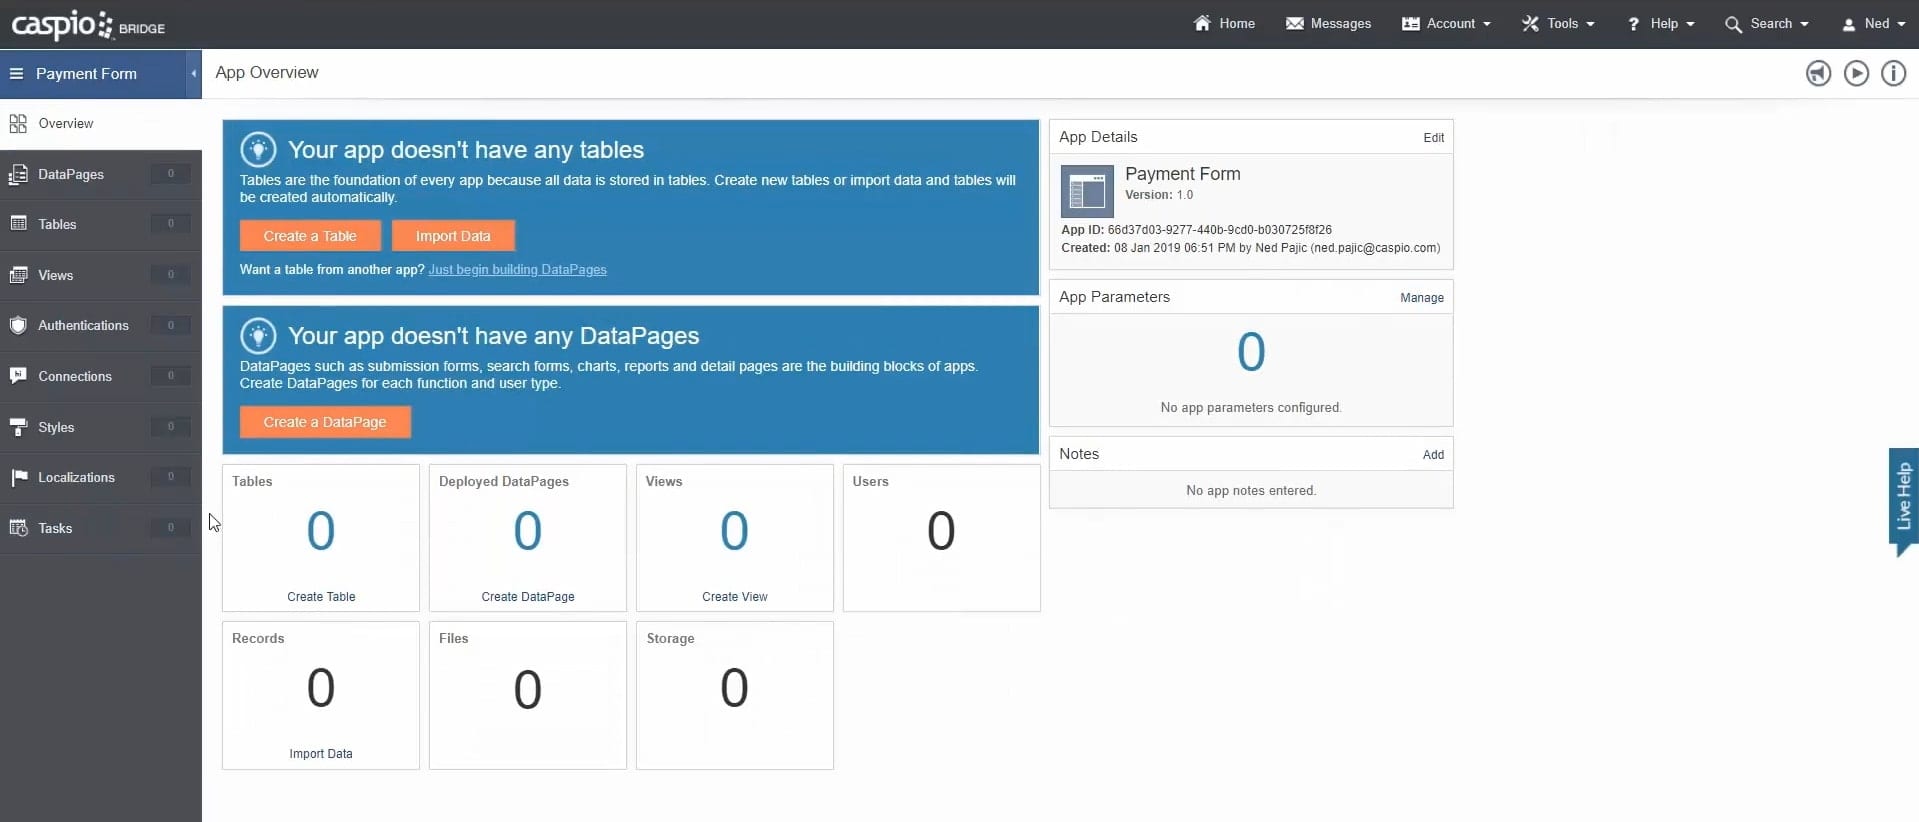
Tables are the foundation or backbone of any app you develop inside Caspio. Click the Tables object to begin.
TABLE 1: Meeting_Rooms
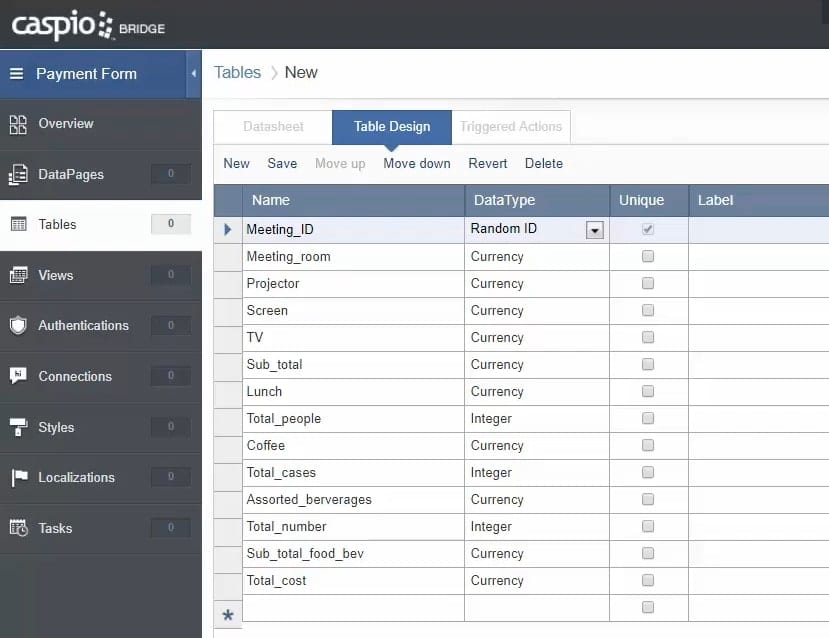
Click the New Table link on top and list the following fields with their corresponding DataType:
- Meeting_ID – Select Random_ID as the DataType.
- Meeting_room – Select Currency as the DataType.
- Projector – Select Currency as the DataType.
- Screen – Select Currency as the DataType.
- TV – Select Currency as the DataType.
- Sub_total – Select Currency as the DataType.
- Lunch – Select Currency as the DataType.
- Total_people – Select Integer as the DataType.
- Coffee – Select Currency as the DataType.
- Total_cases – Select Integer as the DataType.
- Assorted_beverages – Select Currency as the DataType.
- Total_number – Select Integer as the DataType.
- Sub_total_food_bev – Select Currency as the DataType.
- Total_cost – Select Currency as the DataType.
Take note of the following with regards to the data types used:
- Use Random_ID to uniquely identify a meeting.
- Use Currency to store the field’s dollar value.
- Use Integer to store whole numbers instead of decimals.
Click Save on top and name your table Meeting_Rooms, then click Finish.
Note that in your table container, you can always click on Design to modify your fields or click Open to see all your data inside.
Building Your Payment Form
Next, go to DataPages and click the New DataPage link on top. This will launch Caspio’s point-and-click DataPage wizard to help you build your app interfaces.
DATAPAGE 1: Book a Meeting Room
Wizard Step 1 – DataPage Type
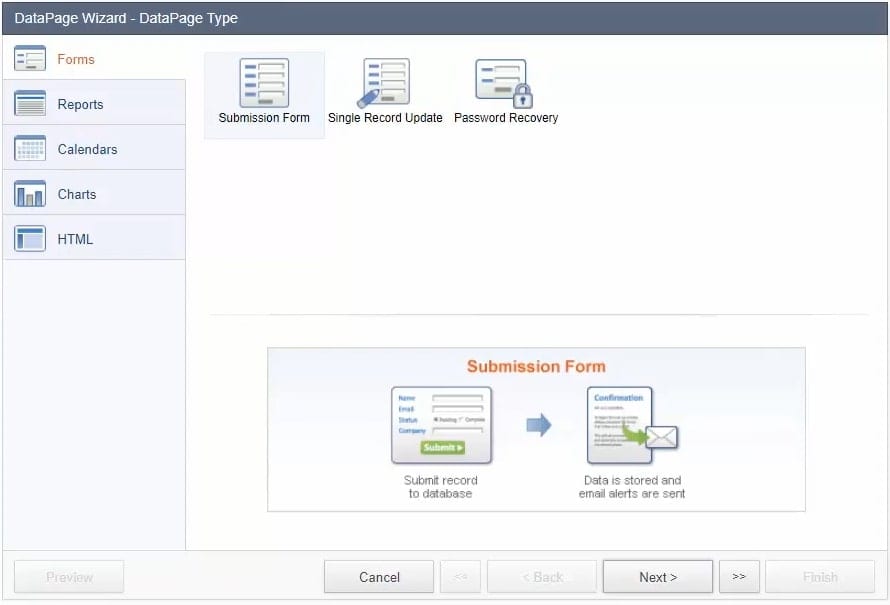 Make sure that Forms is selected, then choose Submission Form on the right-hand side.
Click Next to continue.
Wizard Step 2 – DataPage Data Source
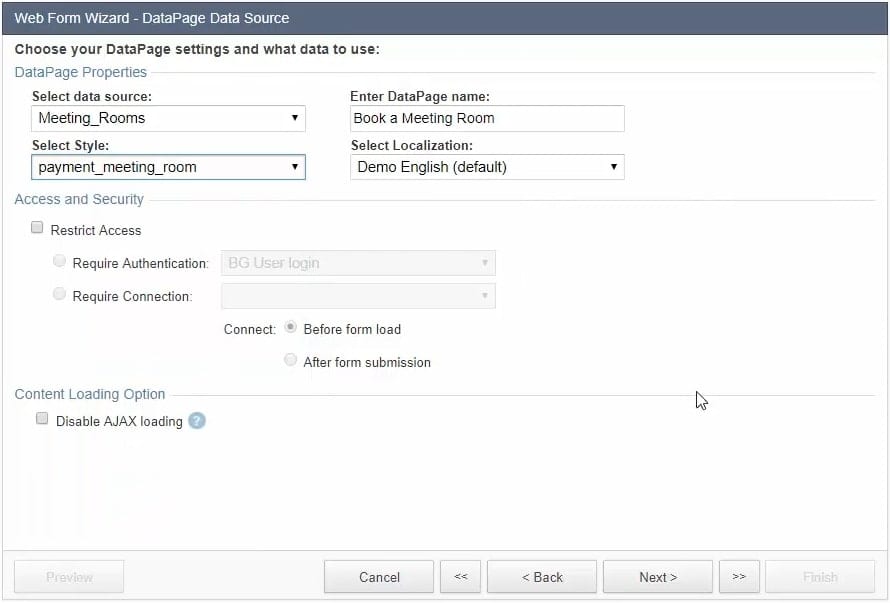
Under DataPage Properties, configure the following fields:
- Select data source – Make sure that Meeting_Rooms is selected.
- Enter DataPage name – Input Book a Meeting Room for this tutorial.
- Select Style – Use any of the pre-loaded styles that comes with your account.
- Select Localization – Use English (default) for now.
Click Next to continue.
Wizard Step 3 – Select Fields
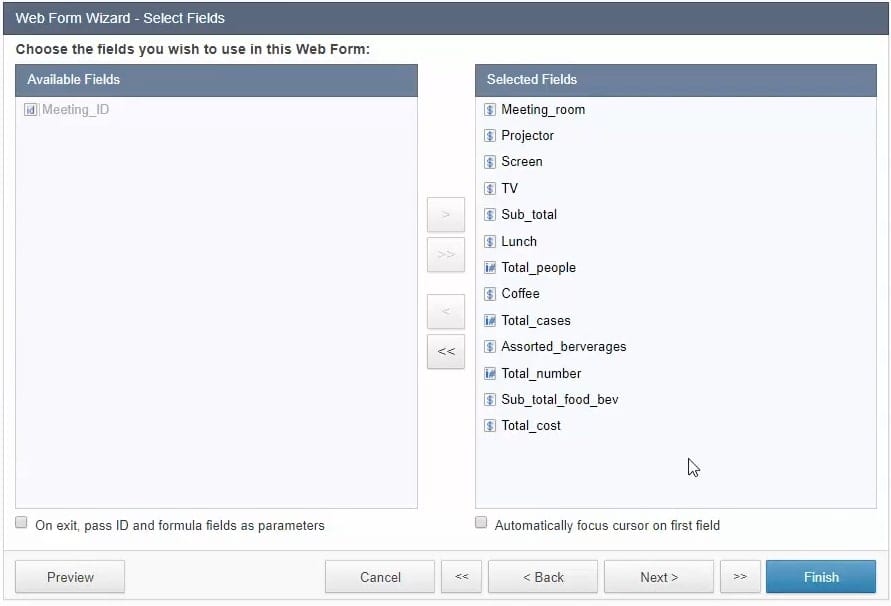 Transfer all Available Fields to your Selected Fields by clicking the “>>” button.
Click Next to continue.
Wizard Step 4 – Configure Fields
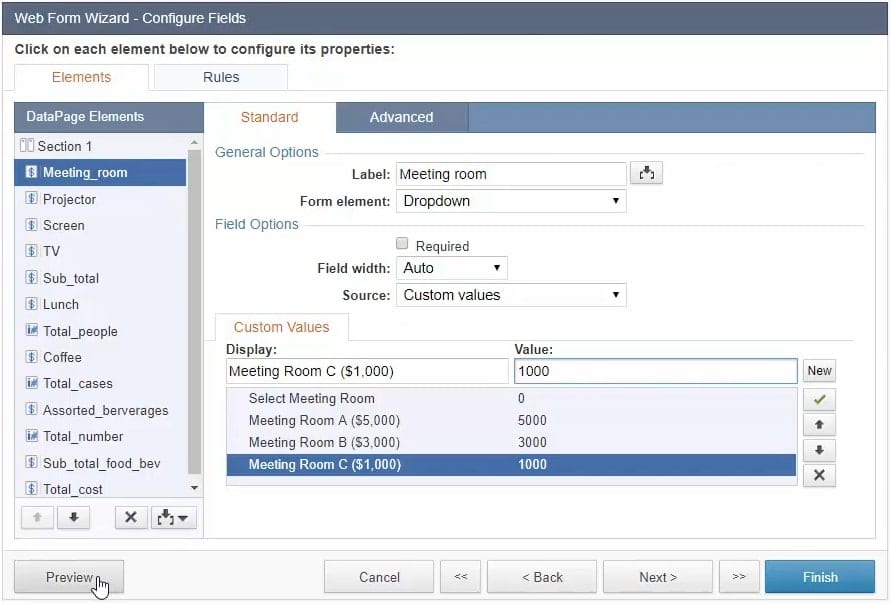 If you’d like to see what your form looks like at any point, click Preview.
You have a very simple form at this point. Make the following changes under DataPage Elements to create dropdowns, radio buttons and calculations:
- Meeting_room – Go to the Standard tab and apply the following changes:
- Under General Options, in the Form Element dropdown, select Dropdown.
- Under the Custom Values tab, in the Display field, input Select Meeting Room.
- In the Value field beside it, input 0.
- Click the New button to the right.
- In the Display field, input Meeting Room A ($5,000).
- In the Value field beside it, input 5000.
- Click the New button to the right.
- In the Display field, input Meeting Room B ($3,000).
- In the Value field beside it, input 3000.
- Click the New button to the right.
- In the Display field, input Meeting Room C ($1,000).
- In the Value field beside it, input 1000.
- Projector – Go to the Standard tab and apply the following changes:
- Under General Options, in the Form Element dropdown, select Radio Buttons.
- Under the Custom Values tab, in the Display field, input None.
- In the Value field beside it, input 0.
- Click the ✔ button to the right to make the option default.
- Click the New button to the right.
- In the Display field, input $1,000.
- In the Value field beside it, input 1000.
- Screen – Go to the Standard tab and apply the following changes:
- Under General Options, in the Form Element dropdown, select Radio Buttons.
- Under the Custom Values tab, in the Display field, input None.
- In the Value field beside it, input 0.
- Click the ✔ button to the right to make the option default.
- Click the New button to the right.
- In the Display field, input $500.
- In the Value field beside it, input 500.
- TV – Go to the Standard tab and apply the following changes:
- Under General Options, in the Form Element dropdown, select Radio Buttons.
- Under the Custom Values tab, in the Display field, input None.
- In the Value field beside it, input 0.
- Click the ✔ button to the right to make the option default.
- Click the New button to the right.
- In the Display field, input $300.
- In the Value field beside it, input 300.
- Sub_total – Go to the Standard tab and apply the following changes:
- Under General Options, in the Form Element dropdown, select Calculated Value.
- In the Formula field, input this simple equation: [@field:Meeting_room]+ [@field:Projector]+ [@field:Screen]+ [@field:TV]
- Click the button that says Formatting…
- In the set of radio buttons under Formatting, select Custom.
- In the dropdown for Format type, select Currency.
- In the dropdown for Digits after decimal, select 0.
- Click OK.
Note that you can also input these fields using the insert button below the Formula panel.
- Lunch – Go to the Standard tab and apply the following changes:
- Under General Options, in the Form Element dropdown, select Radio Buttons.
- Under the Custom Values tab, in the Display field, input None.
- In the Value field beside it, input 0.
- Click the ✔ button to the right to make the option default.
- Click the New button to the right.
- In the Display field, input $14.99 Per Person.
- In the Value field beside it, input 99.
- Total_people – Go to the Advanced tab and apply the following changes:
- Under External Associations and Defaults, under On load, enable Receive value or parameter.
- Make sure that Default Value is selected in the dropdown underneath.
- In the text field beside it, input 0.
- Coffee – Go to the Standard tab and apply the following changes:
- Under General Options, in the Form Element dropdown, select Radio Buttons.
- Under the Custom Values tab, in the Display field, input None.
- In the Value field beside it, input 0.
- Click the ✔ button to the right to make the option default.
- Click the New button to the right.
- In the Display field, input $9.99 Per Case.
- In the Value field beside it, input 99.
- Total_cases – Go to the Advanced tab and apply the same changes as Total_people.
- Assorted_beverages – Go to the Standard tab and apply the following changes:
- Under General Options, in the Form Element dropdown, select Radio Buttons.
- Under the Custom Values tab, in the Display field, input None.
- In the Value field beside it, input 0.
- Click the ✔ button to the right to make the option default.
- Click the New button to the right.
- In the Display field, input $5.99 Per Person.
- In the Value field beside it, input 99.
- Total_number – Go to the Advanced tab and apply the same changes with your Total_people
- Sub_total_food_bev – Go to the Standard tab and apply the following changes:
- Under General Options, in the Form Element dropdown, select Calculated Value.
- In the Formula field, input this simple equation: [@field:Lunch]* [@field:Total_people]+ [@field:Coffee]*[@field:Total_cases]+ [@field:Assorted_beverages]* [@field:Total_number]
- Click the button that says Formatting…
- In the set of radio buttons under Formatting, select Custom.
- In the Format type dropdown, select Currency.
- In the Digits after decimal dropdown, select 0.
- Click OK.
- Total_cost – Go to the Standard tab and apply the following changes:
- Under General Options, in the Form Element dropdown, select Calculated Value.
- In the Formula field, input this simple equation: [@field:Sub_total]+ [@field:Sub_total_food_bev]
- Click the button that says Formatting…
- In the set of radio buttons under Formatting, select Custom.
- In the Format type dropdown, select Currency.
- In the Digits after decimal dropdown, select 0.
- Click OK.
Click Preview once again to view your changes and test the calculated fields.
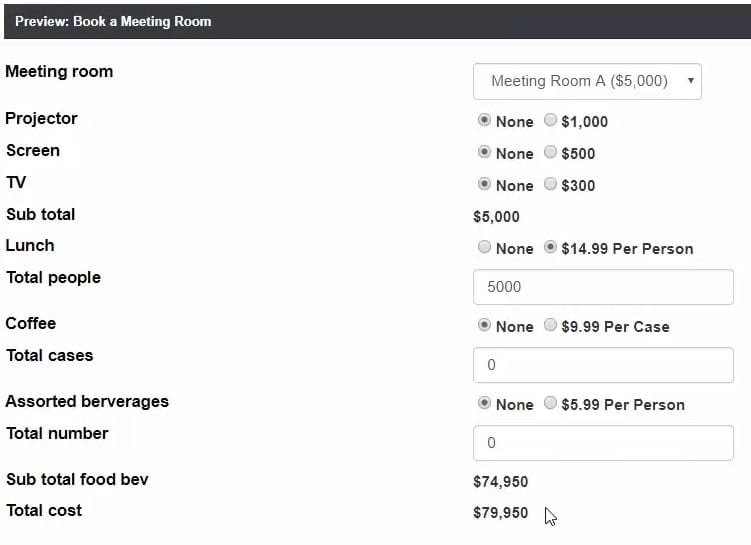
Try selecting different options in your form and see how they affect the Total Cost.
- Meeting_room – Go to the Standard tab and apply the following changes:
Inserting Payment Processing Fields
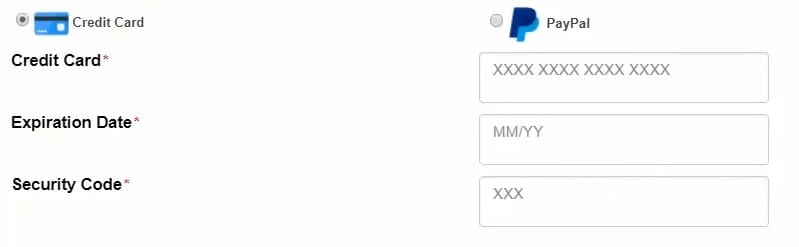
The last thing you need to do on this wizard screen is insert credit card and PayPal options.
Follow these steps to add your payment gateways and payment processors:
- Click the insert button underneath your list of DataPage Elements.
- Select Payment.
- Make sure that Payment is at the bottom of your DataPage Elements by highlighting the field and clicking the down arrow button.
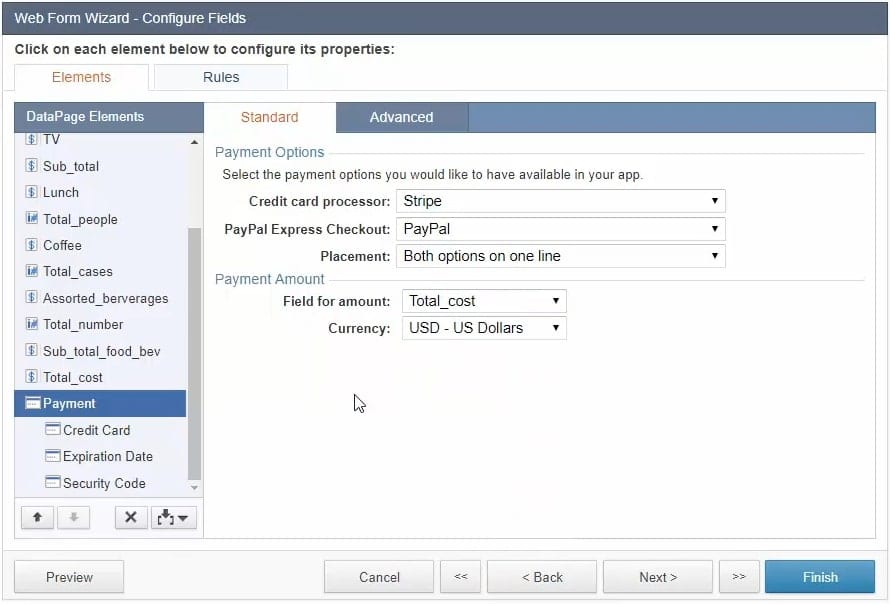
Make the following changes in the Standard tab:
- Under Payment Options, in the Credit card processor dropdown, make sure that Stripe (pre-configured for this tutorial) is selected.
- In the PayPal Express Checkout dropdown, select PayPal (pre-configured for this tutorial).
- In the Placement dropdown, select Both options on one line.
- Under Payment Amount, in the Field for amount dropdown, select Total_cost. This field will hold the final amount for processing.
- In the Currency dropdown, use the default selection of USD – US Dollars.
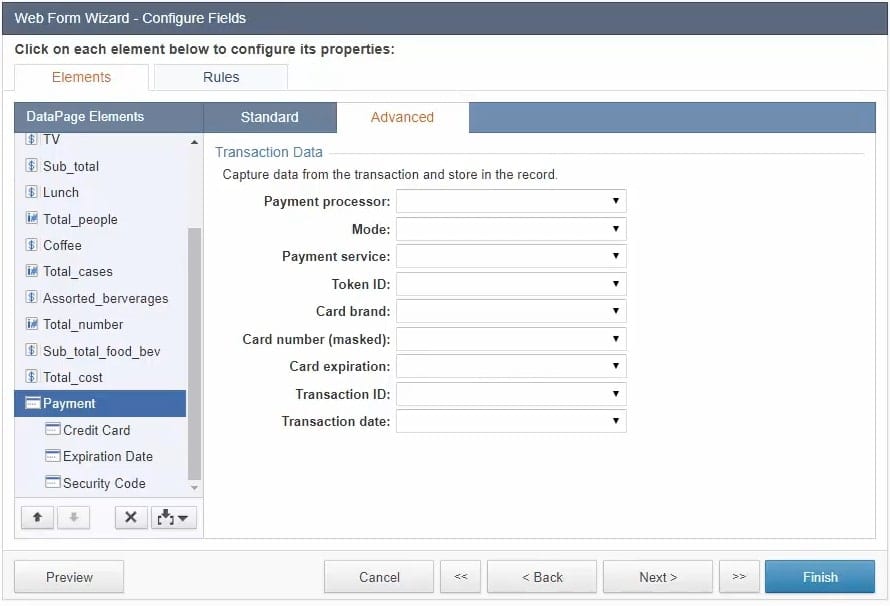
Note that in the Advanced tab, you can capture and store additional transaction data inside your table. However, you’ll need to create these fields inside your table first. Only then can you select them from your dropdown menus.
Click Preview to check how the final form will look like on your website.
Click Finish to save your work, then deploy your DataPage to your website (similar to how it’s done in the previous videos).
See You in the Next Video!
In the final video, we’ll show you how to inject some HTML and CSS into your form to make it more visually appealing.
Next Steps

NEW IDC WHITE PAPER

TALK TO AN EXPERT

SEE CASPIO IN ACTION

© 2024 Caspio, Inc. Sunnyvale, California. All rights reserved.